Dynamics 365 Business Central/NAV provides SOAP web services from Dynamics NAV objects for easy communication and data exchange in a secured environment. There are two types of SOAP web services available in Dynamics BC/NAV: Page and Codeunit. We have the SSIS Integration Toolkit for Microsoft Dynamics 365 to support interacting with Dynamics BC/NAV data through Page object, in this blog post, we demonstrate how to work with Dynamics BC/NAV Codeunit web service by using HTTP Connection Manager and Web Service components offered in our SSIS Productivity Pack.
Obtain Codeunit Web Service URL
Before getting started consuming the Codeunit API, we need to get the Codeunit web service URL. Codeunit SOAP URL is available in the Web Services module in the Dynamics BC/NAV application and is the URL we will use to call the Codeunit functions.

Configure HTTP Connection Manager
Next, configure the HTTP Connection Manager to establish the connection to the Dynamics BC/NAV server.
Set Up Base URL
The Codeunit SOAP URL obtained from the previous step is used as the Base URL in HTTP Connection Manager. The Codeunit Base URL should have an address in the following format: https://<Server>:<WebServicePort>/<ServerInstance>/WS/<CompanyName>/Codeunit/<ServiceName>.
For example:
- For Dynamics Business Central Online, the Base URL will be: https://api.businesscentral.dynamics.com/v2.0/735e199d-a8df-4be5-836d-b298276cbdba/Production/WS/CRONUS%20Canada%2C%20Inc./Codeunit/CustomerMgt
- For Dynamics Business Central/NAV On-Premises, the Base URL should be: https://localhost:7047/DynamicsNAV/WS/CRONUS%20Canada%20Inc./Codeunit/CustomerMgt
Authentication
After filling in the Base URL, set up the authentication method to connect to a NAV or a Dynamics 365 Business Central Online instance.
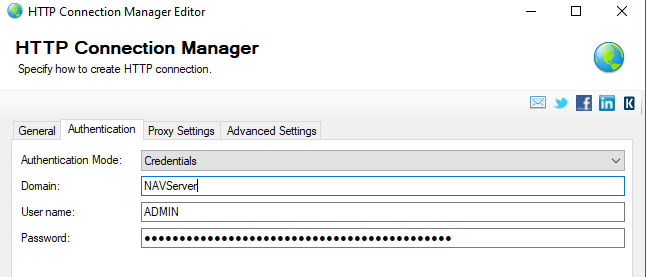
To connect to Dynamics BC/NAV On-Premises instance, set the Authentication Mode to Credentials and provide the domain, username and password values.
Connecting to Dynamics 365 Business Central Online, choose between Basic and OAuth2 authentication types.
Authenticate using an Access Key
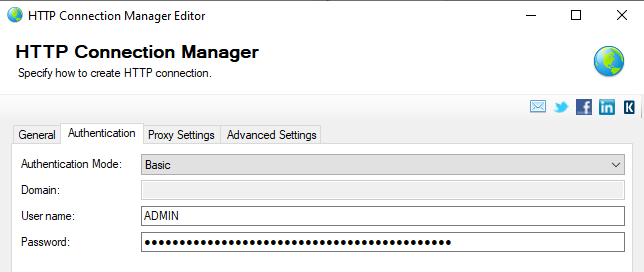
To authenticate to Dynamics 365 Business Central Online with the Access Key, set the Authentication Mode to Basic, NAV users' Web Service Access Key would be the password to be used in the Basic authentication.
Authenticate Using OAuth
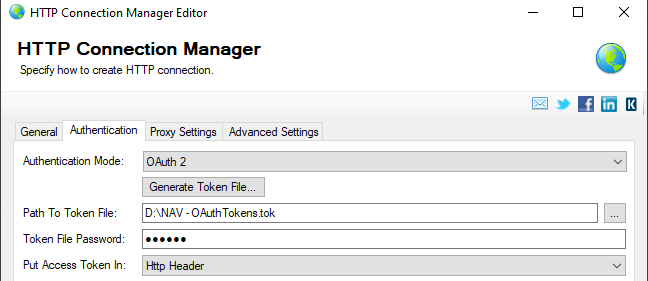
To generate the OAuth token, register an application in the same Azure AD Directory in which you registered Business Central.
Once you have the Microsoft AAD app registered and configured, set the authentication mode to OAuth 2 in HTTP Connection Manager. You should be able to get all the required information to put into the OAuth Token Generator as shown below:
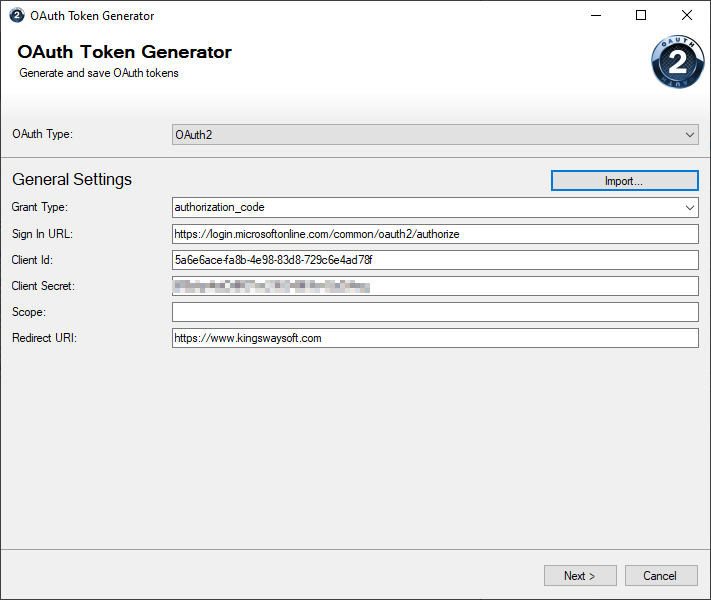
Click the Next button to go to the next page and click either the Authorize In App… or Authorize In Browser… button to open the authorization page, login and consent to the permissions the app requested. You will be redirected to the redirect_uri web page that you set up in the Microsoft AAD app with an authorization code in the code parameter. Copy the entire URL to the pop-up dialog if you are using the Authorize In Browser mode, then you will be navigated to the Request Tokens page in OAuth Token Generator.
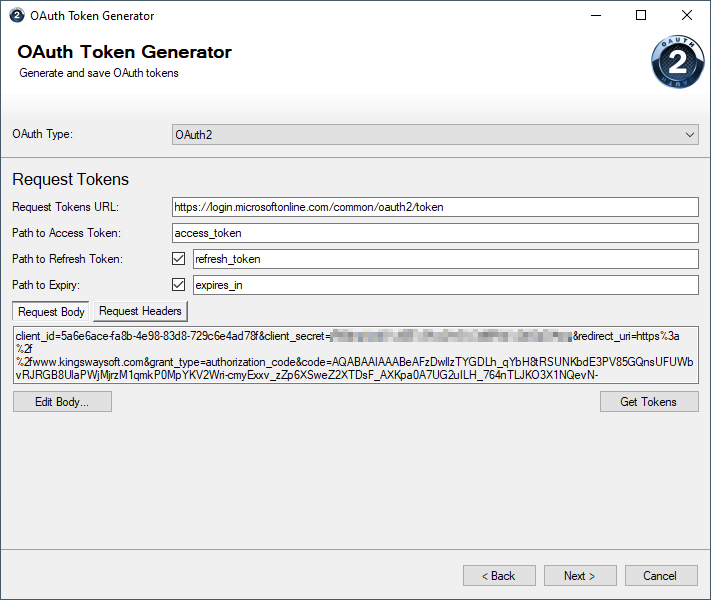
Fill in the Request Tokens URL and click Get Tokens button to request an access token, once the OAuth access_token and refresh_token are successfully retrieved, save the token file to your local file system with a password. All sensitive information will be encrypted with the provided password in the token file.
NOTE: If you have an OAuth token file generated in SSIS Integration Toolkit for Microsoft Dynamics 365, you can use the token file directly in HTTP Connection Manager.
Test Connection
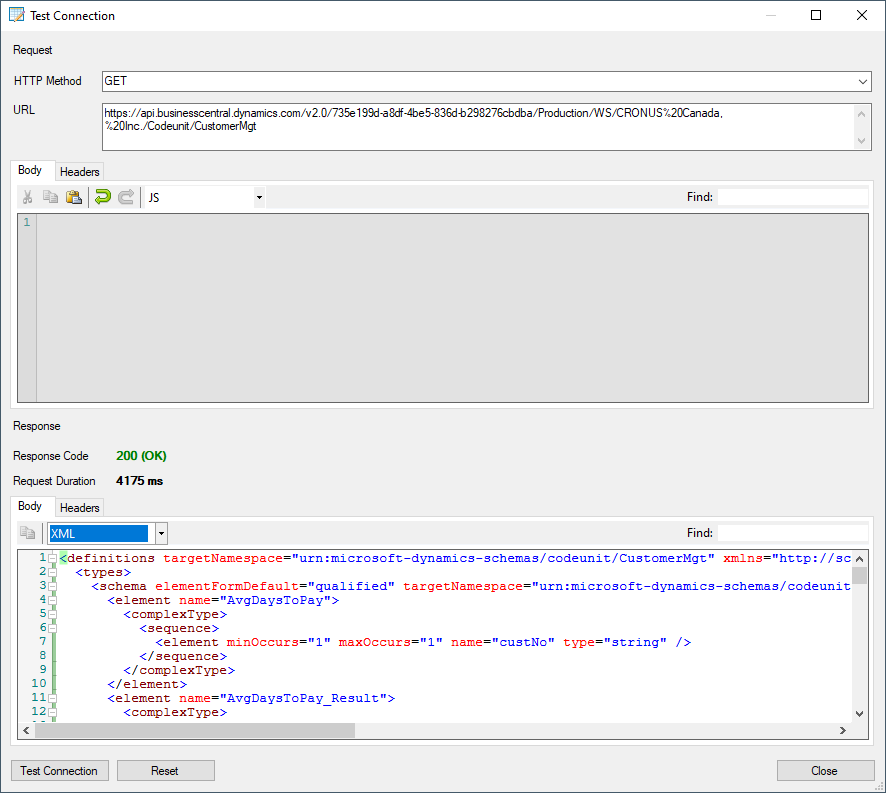
After all the connection information has been provided, click the "Test Connection" button to test if the user can successfully login to the NAV server. You are expecting to get a 200 OK response if the authentication is set up correctly.
Consume Codeunit Web Service
To call Codeunit SOAP web service, depending on how you want to use the response data, you need to use one of our Web Service components: Web Service Source, Web Service Destination or Web Service Task. In our example, we will use Web Service Source.
In the Web Service component, provide the Codeunit SOAP URL as the Source WSDL file path, then click the Load WSDL button, the Web Service component should populate the other fields in the editor with information from the loaded WSDL file.
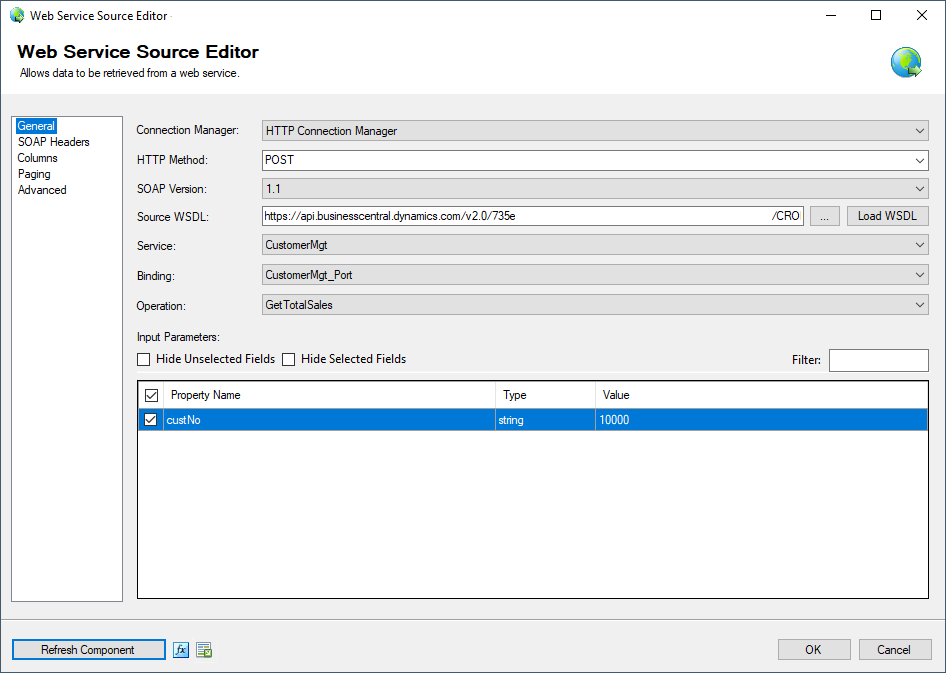
The Codeunit service that we are using contains an operation called 'GetTotalSales' that takes custNo as the input parameter and returns a decimal value with the total sales amount for the given customer.
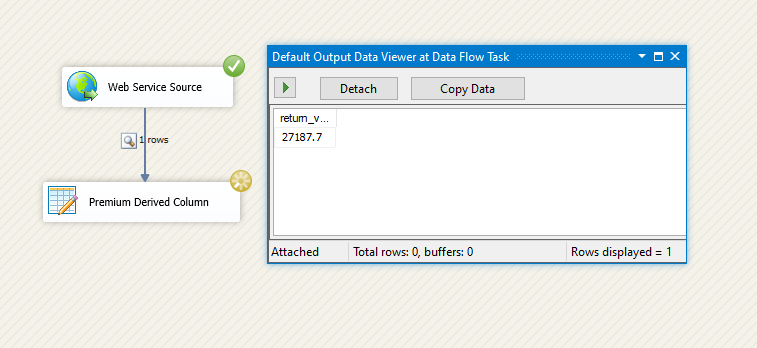
As shown in the screenshot above, we are getting the total sales amount for customer "10000". Let's set up a dummy destination component and enable the Data Viewer to check the result returned from the Codeunit function.
Conclusion
By using the HTTP Connection Manager and Web Service components offered in SSIS Productivity Pack, easily authenticate to Dynamics 365 BC/NAV instance and call Dynamics 365 BC/NAV Codeunit web service without writing a single line of code.

