Microsoft Dynamics 365 CRM Bulk delete action is provided by the API to submit a bulk delete job that deletes selected records in bulk. This job is asynchronous and runs in the background without blocking other activities. The bulk delete action doesn’t necessarily make delete action faster, but given it runs in the background, it’s advantageous in comparison to the regular delete action.
The BulkDelete action requires a FetchXML to query the records targeted for deletion. This query can be a string in the “BulkDeleteQuery” field of our CRM Destination component. The recommended approach to do this would be by using a Derived Column component. Before we proceed with our example, let’s take a look at what are the fields that are exposed (both required and optional) for BulkDelete action.
- BulkDeleteQuery: the FetchXML query for a bulk delete job.
- CCRecipients: the GUID id of the systemuser listed in the CC box of the email notification.
- JobName: the name of the bulk delete job.
- SendEmailNotification: a boolean value that indicates whether to send an email notification after the bulk delete job has finished running.
- ToRecipients: the GUID id of the systemuser listed in the To box of the email notification.
- RecurrencePattern: Sets the recurrence pattern for the bulk delete job. (Optional)
- StartDateTime: Sets the start date and time to run a bulk delete job. (Optional)
To build a FetchXML query, use our CRM Source component within our SSIS Integration Toolkit for Microsoft Dynamics 365. It has an inbuilt SQL-to-FetchXML converter where you enter your SQL query to get the appropriate FetchXML.
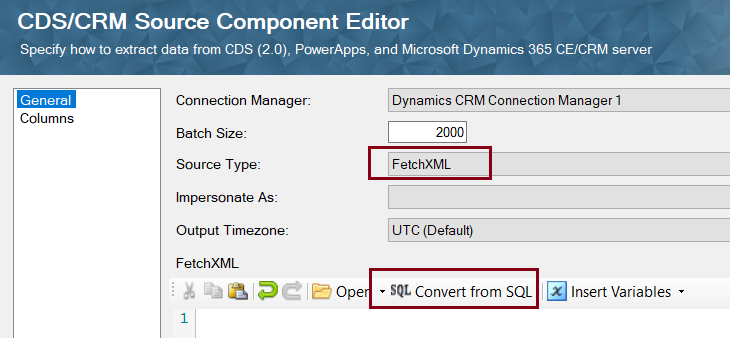
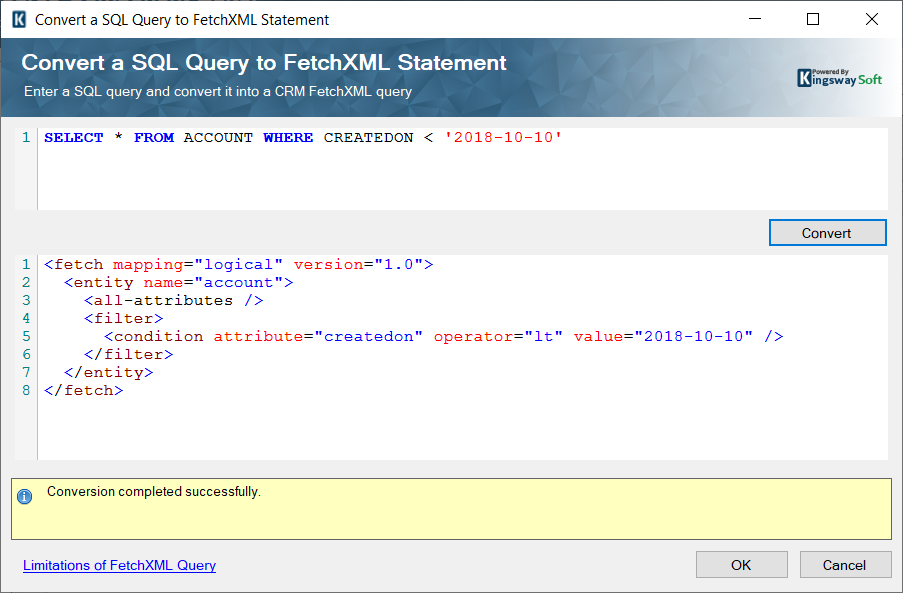
Please note that the CRM Source component here is just for building the FetchXML query, and it is not used in the data flow. You can remove it once you get the query. In our example, we are going to use BulkDelete action to delete accounts that were created before a specific date (in our case, October 10, 2018).
<fetch mapping="logical" version="1.0">
  <entity name="account">
    <all-attributes />
    <filter>
      <condition attribute="createdon" operator="lt" value="2018-10-10" />
    </filter>
  </entity>
</fetch>
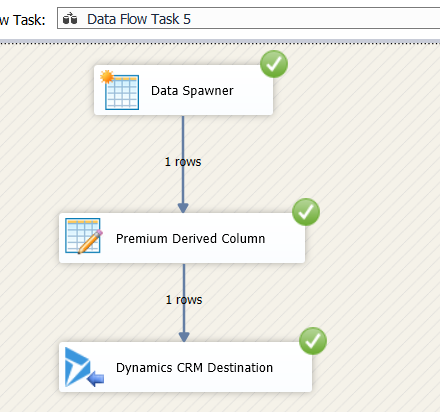
We can now enter this FetchXML query in our Premium Derived Column component. Since the Premium Derived Column component is a transformation component, a source component is required in the upstream. Our Data Spawner component can be used for this (both our Premium Derived Column and Data Spawner components can be found in our SSIS Productivity Pack). You can follow the below design.
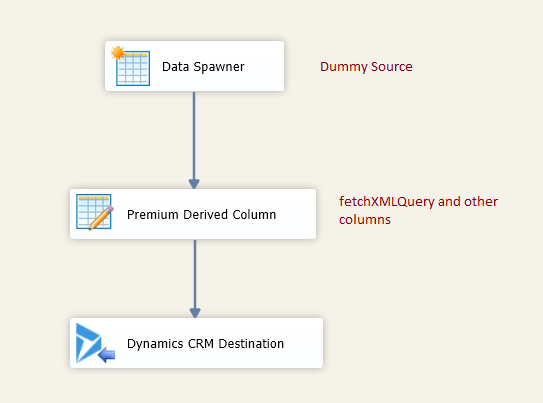
As you can see, the FetchXML query would need to be appropriately escaped and tested to be in the correct format. You can give the other required fields in it as well. Please note that a variable or a parameter can be used inside the FetchXML query to parameterize it so that it can dynamically accept values at runtime. This would be useful when the filter condition (createdon field, in this case) needs to be dynamically passed. You would be able to concatenate variables properly using the Premium Derived column expression editor.
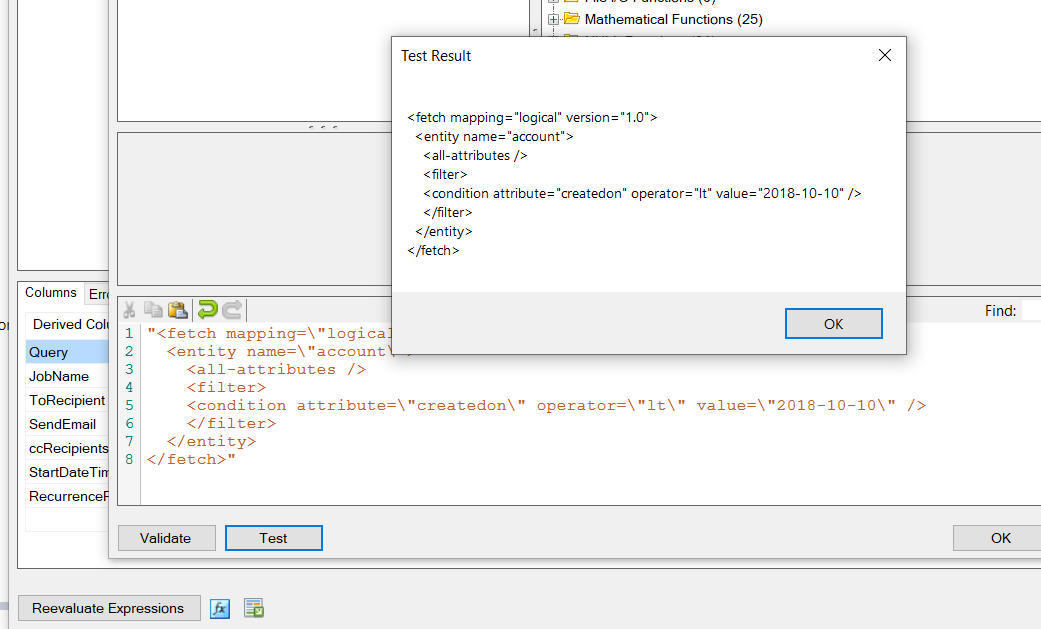
The “JobName” can be any distinguishable name used to identify the job and its nature. And the “RecurrencePattern” is optional, and is used to specify if the job needs to be recurring. Microsoft allows the below parameters in the BulkDelete jobs.
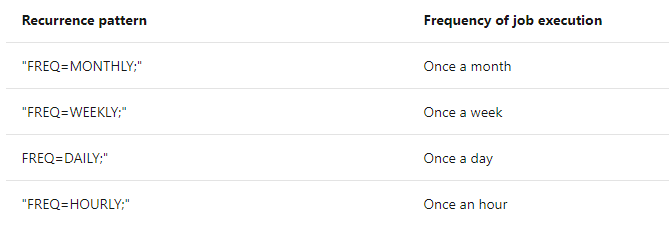
There could be restrictions as to what frequency can be set. You should check the below link for more details.

Once you have provided these, you can map them to the CRM Destination component, by choosing the “BulkDelete” action in it.
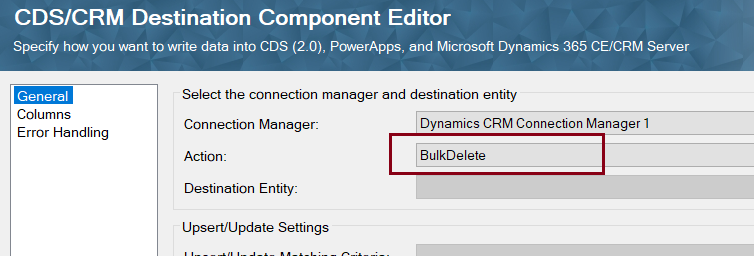

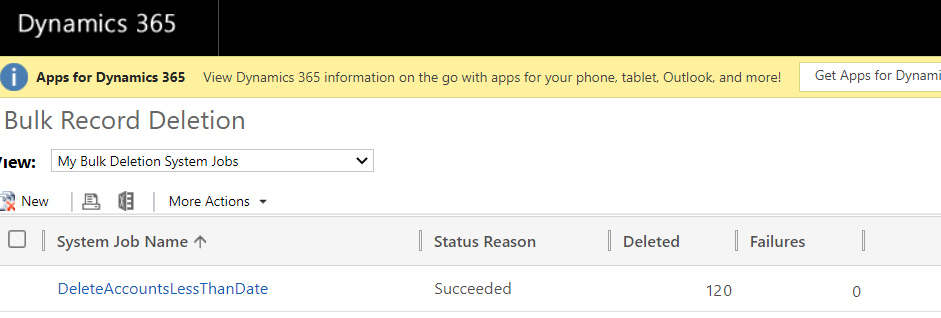
Now, as BulkDelete jobs are asynchronous, your data flow task should execute successfully and complete in some time, as long as you there are no other logical errors. The BulkDelete job runs in the background, and you would be able to see the job going through its phases from your CRM UI by navigating to Settings > Data Management > Bulk Record Deletion.

Final Thought
In this way, using BulkDelete action, you can quickly delete numerous records in CRM at a go as a background process. Please note that you can have another data source to provide the FetchXML query and other fields, and using our Data Spawner is just one possibility.

