Assignment rules are a set of criteria that determine how a lead or case will be assigned when they are created or updated in Salesforce. This is an extremely useful feature in Salesforce that can help automate your organization's process when working with objects, such as leads and cases. For example, let's assume that you are trying to import a large list of leads that come from different regions, and you would want those leads to be assigned to the respective sales executive who is handling that specific region. That is, assignment rules will automatically assign a lead that is located in Toronto to the sales executive that handles the Toronto region, and so on. This automates how your leads are distributed and greatly reduces manual assignment efforts. This will also ensure that leads are assigned to the correct representatives and teams, thereby adhering to any standard operating procedure that may be in place.
In this blog post, we will go over how to create Assignment Rules and how to effectively use them when importing records with our SSIS Integration Toolkit for Salesforce.
Creating Assignment Rules
To start, we will first need to create an Assignment rule, which we can do by logging into the Salesforce portal and navigating to Setup. In the quick find menu, you can search for Assignment Rules. Assignment Rules can be applied to both lead and case objects. In our blog post, we will work with Lead Assignment Rules, however, the concept remains the same when working with Case Assignment Rules as well.
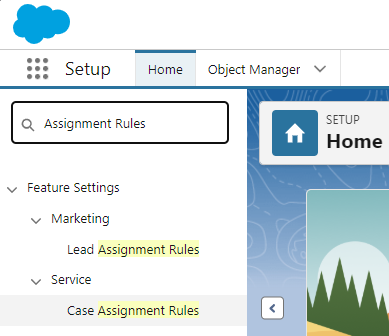
Once you are on the Lead Assignment Rules page, you can click on the New button to create a new Assignment Rule. You can then provide the Name for your Assignment Rule in the Rule Name field.
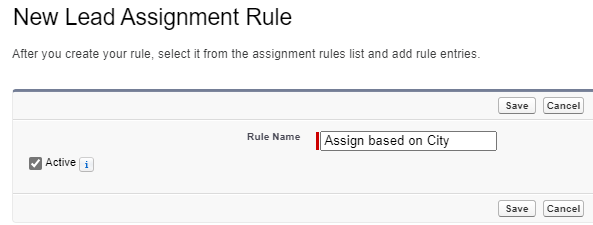
Make sure to check the Active checkbox to activate the rule. Now that you have created the rule, you can click on it and click the New button to add Rule Entries.

The Rule Entries are the actual rules that decide if the case should be assigned to a specific user. You will then be redirected to the Rule Entry page to configure your rule.
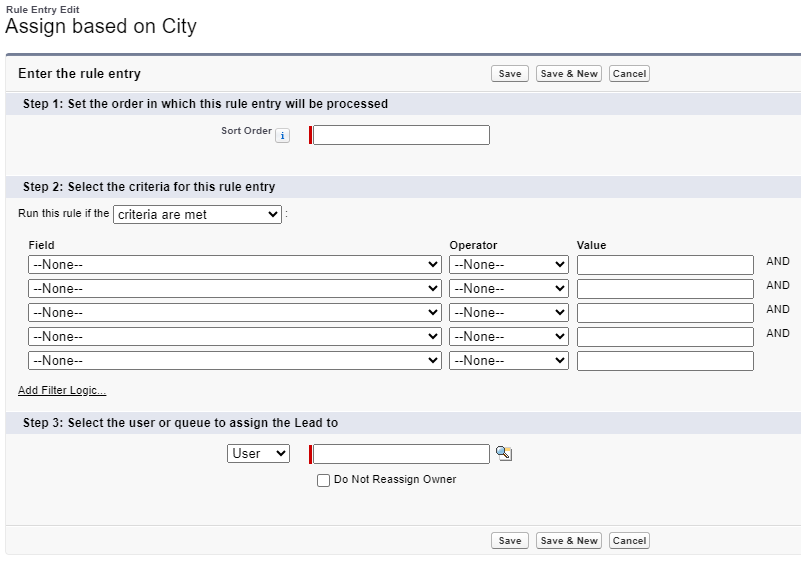
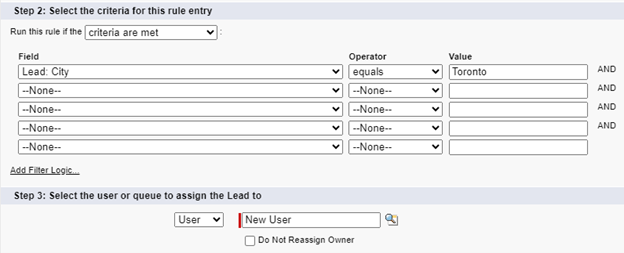
We will first enter the Sort Order of the rule. The Sort Order is the order in which rules are processed when a new Lead is submitted. The newly submitted Lead will go top to down the rule entry list in the sort order until a rule is fulfilled. Since this is the first rule that is being created, it will automatically be set as 1. Then, you can select the field, operator and value. Then you can choose which user or queue the Lead gets assigned to. In our example, we have set the rule that if the Lead’s city is Toronto, it will get assigned to the user called New User.
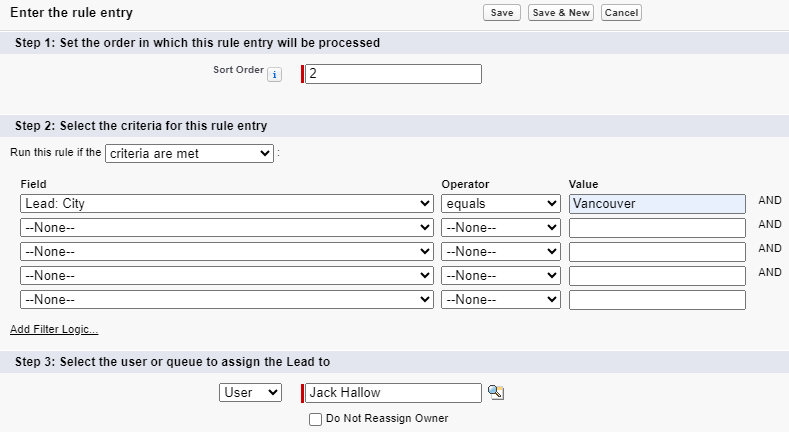
We set a second rule that if the city is Vancouver, it will be assigned to a user called Jack Hallow.
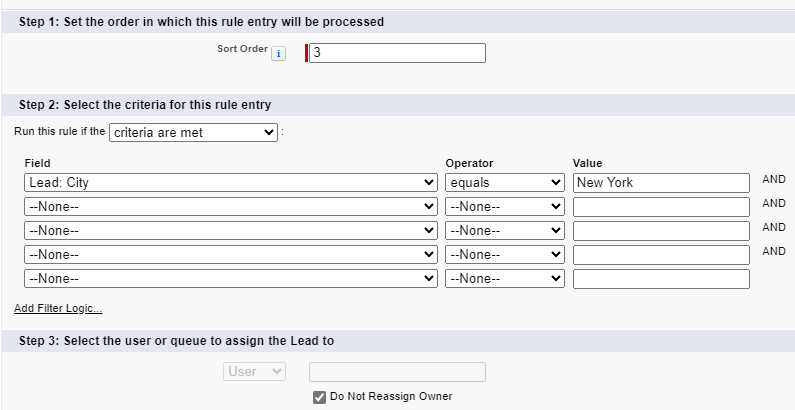
For our third rule, if the city is New York, we will use the Do Not Reassign Owner option. This will specify the current owner of a lead will not be reassigned. The user that is creating the lead will be the owner.
You can also assign the lead to a queue instead of a user by selecting the Queue option from the dropdown.

Now that we have the assignment rules set up, we need to set the Assignment Rule in our KingswaySoft Salesforce Connection Manager. To do that, we will need to get the Assignment Rule ID. There are 2 ways to get the Assignment Rule ID, reading it from SSIS using the KingswaySoft Salesforce Source component, or through the Salesforce UI, which will be discussed and compared in the upcoming section.
Getting Assignment Rule ID from UI
Getting the Assignment Rule ID from the UI is a quick but slightly confusing process. For this, we will go back to the Lead Assignment Rule page. In the address bar, you should be able to find a 15-digit ID that starts with “01Q”. The ID will usually be in the middle of the URL and can be difficult to find. You can then copy the values out to use in your SSIS design.

Reading Assignment Rule ID from SSIS
Reading the Assignment Rule ID from SSIS is a more straightforward process. To read the ID, we will use the Salesforce Source component to read the Assignment Object.
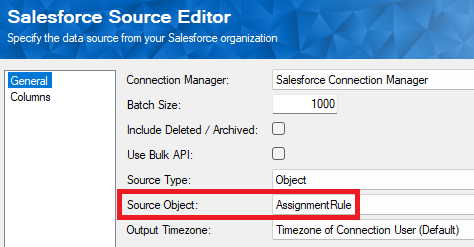
The Assignment Rule ID provided, when reading from SSIS, will be similar to the Assignment Rule ID from the UI. However, it will have 18 digits instead of 15 digits. Our components are able to handle both the 18-digit and 15-digit IDs.

Applying Assignment Rules
To apply the Assignment Rule in our component, we will need to configure it in our Salesforce Connection Manager. Under the Advanced Settings tab and within the Optional Headers section, you can specify the Assignment Rule you wish to use by entering the Assignment Rule ID. You can enter either the 18-digit ID or the 15-digit ID.
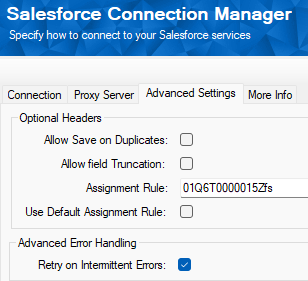
Our Connection Manager also has the option to Use Default Assignment Rule. If you select this option, it will allow you to use the active assignment rule without needing to specify the Assignment ID. You can check which Assignment Rule is active on the Assignment Rules page. You are only allowed to have one active Assignment rule at once; in this case, the Assign based on City rule is Active.

Writing to Salesforce
Now that we have applied the Assignment rule, the final step is to write the Leads to Salesforce. In our provided example, we use a Data Spawner and Salesforce Destination; however, the Data Spawner is just a placeholder, which can be changed to any Source component that might be applicable in your business.
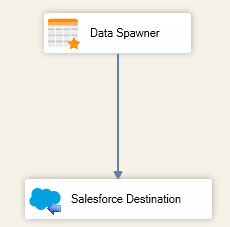
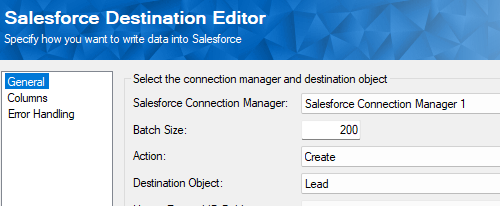
We will be writing Leads that are from Toronto into Salesforce. To do that, we will use a Salesforce Destination component with a Create Action and the Destination object set to Lead. Make sure that you select the Connection Manager for which you have set up the Assignment Rule.
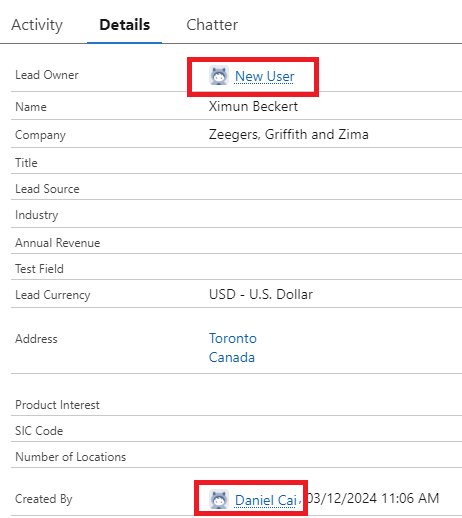
With the Assignment Rule set in place for our Connection Manager, the Leads will be automatically assigned based on the value mapped for the City. For our example, we created a Lead named Ximun Beckert from Toronto. Although the user who created the record was different, the Lead Owner was automatically assigned to the New User, since the Lead is from Toronto.
Conclusion
In this blog post, we have gone over the advantages of using Assignment Rules and how to create them. We discussed how to find the Assignment ID from both Salesforce UI and SSIS. Lastly, we showed how to apply the Assignment Rules to our Salesforce components. Utilizing Assignment Rules in your Salesforce integration could simplify any such processes that you may have.
We hope this helps!

