Many modern services and APIs nowadays often provide custom attribute support so that the user can easily customize the application by adding their own custom fields to suit their specific business needs. Such capabilities can greatly improve user adoption. While working with these APIs in an application or an integration scenario, the custom fields/attributes are often discovered along with the metadata call that retrieves the standard ones, and at other times, they need a separate request. When it comes to Azure Active Directory (Also known as Azure Entra Id, but in this blog post, we will be using the common terminology, Azure AD), it offers custom extension attributes for objects like users and groups, and these can be easily added and managed from Azure Portal. When it's time to work with these attributes from within your SSIS package, these would need to be discovered for enabling read/write actions on custom data. In this blog post, we will be going over a few details with respect to the creation of Azure AD custom attributes, as well as its discovery for integration and migration purposes, using KingswaySoft's Active Directory components made available in our SSIS Integration Toolkit for Directory Services. A prerequisite for this would be to have the Azure AD connection manager created in your SSIS package, and once available, you can use the below approach in either the Active Directory Source or Destination component. More details on these components can be found in our Online Help Manuals, linked below.
- Active Directory Connection Manager
- Active Directory Source Component
- Active Directory Destination Component
First, let's do a quick overview of how the custom extension attributes are created in Azure.
Add a custom attribute in Azure AD
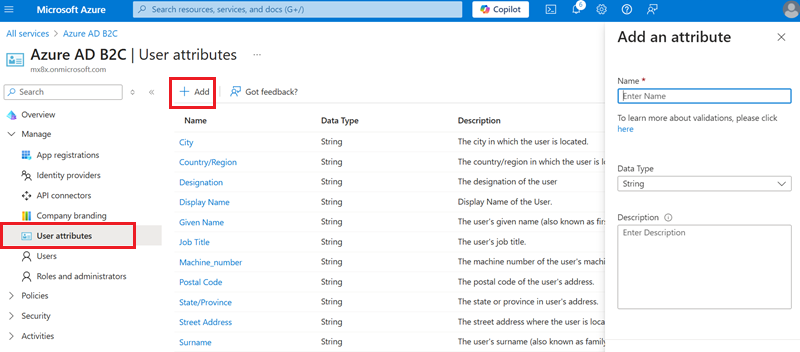
You could easily create your set of custom attributes by navigating to the Azure AD's User attributes section. Here, you will be able to see the list of standard attributes that Azure AD provides out of the box. To add a new custom attribute, you would click on Add and fill up the form that comes up.
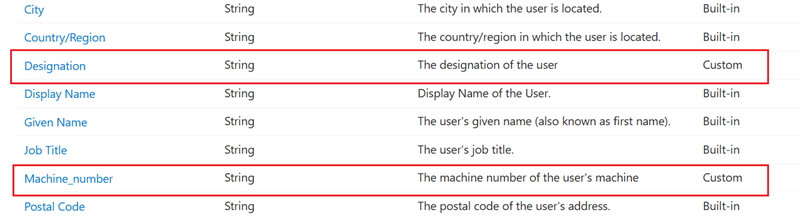
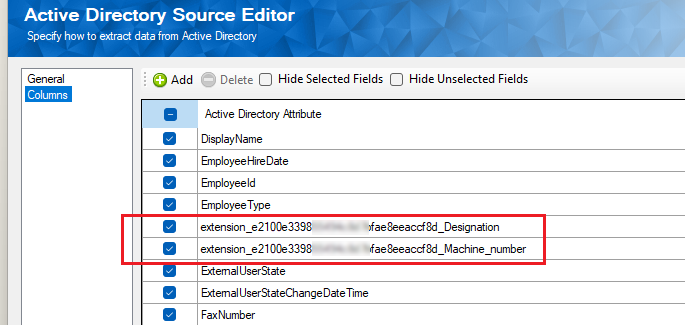
Once you have added the custom attributes, they will show up in the list as shown below. In our example, we have added two new custom attributes, namely Designation and Machine_number.
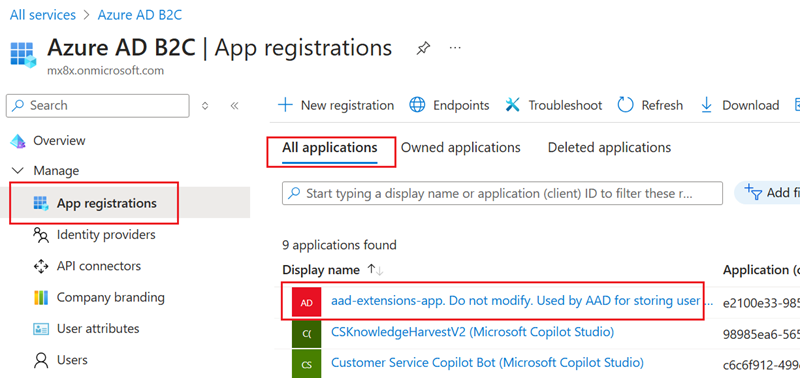
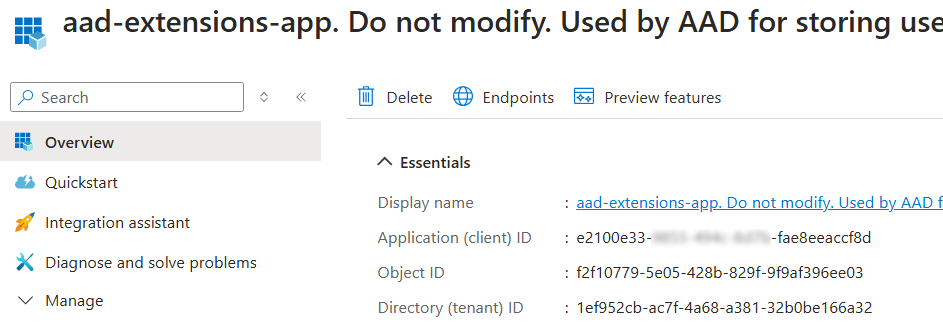
Now that the custom attributes are available, you can navigate to App Registrations within the Azure portal. The extension attributes are attached to an application, that gets auto-generated whenever custom extension attributes are created. To access it, choose the App that has the name "aad-extensions-app. Do not modify. Used by AAD for storing user data". Open it, and you will find it similar to any other registered application on Azure. Note that you should not modify this app, as mentioned in its name, as it's used to store the user data. From this app, you can copy out the Client or Application ID, which we will be using in the upcoming section to discover the attributes of our SSIS components.
Working with Custom Attributes in Active Directory Source Component
Now, moving into the SSIS package, you can use the KingswaySoft Active Directory Source/Destination component to read or write to the AAD objects. In both components, you can discover the custom extension attributes. Generally, the attributes are discovered as a part of the metadata discovery call sent to Microsoft Graph API. However, in cases where the attributes are not being discovered, we have an "Add" feature in the components, which you can click that opens up an Add Custom Field window, as shown in the example below.
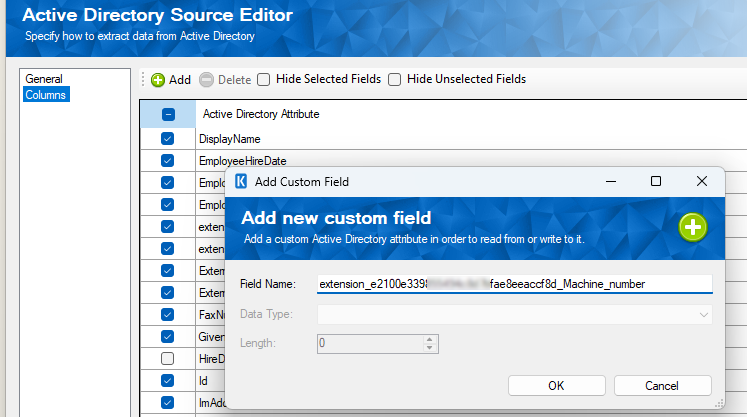
Custom attributes in the Microsoft Graph API are named by using the convention extension_{appId-without-hyphens}_{extensionProperty-name} where {appId-without-hyphens} is the stripped version of the Application Id for the aad-extensions-app we had seen in the above section. Therefore, you would need to enter "extension_<ApplicationGUIDWithoutDashes>_Machine_numnber" for one attribute, and "extension_<ApplicationGUIDWithoutDashes>_Designation" for the other. Note that these need to be entered one by one, and also if there is a space in your field name, an underscore (_) needs to be added at discovery.
Once done, you may click on the OK button to save the changes, which returns you to the Columns page again, from there you can find your attribute added to the source component.
After you have finished configuring the source component, you may execute the data flow which will extract data from Azure AD accordingly. Included in the returned rows, you should be able to find any available values in those two custom attribute columns.
Working with Custom Attributes in Active Directory Destination Component
When working with an Active Directory destination component, it provides a similar functionality that allows you to add custom attributes to the destination component. This provides you the capability of writing data to the target custom attributes with ease, which greatly enhancement your integration development productivity, and it takes a few clicks to achieve so.

Conclusion
By following the above approach, you would find that KingswaySoft Azure AD components make it easier to work with the custom extension attributes for both reading and write with great ease. This helps achieve important integration scenarios by integrating your Azure AD data with other applications or database systems. Such integration can be automated through typical scheduling capability which greatly improves business efficiencies.
We hope this has helped!