Using the Premium ADO.NET Source Component
The Premium ADO.NET Source Component utilizes the out-of-the-box ADO.NET Connection Manager to facilitate reading from databases. There are three pages for configuration:
- General
- Output
- Pre & Post Commands
General Page
The General page of the Premium ADO.NET Source Component allows you to specify the component's general settings.

- Connection Manager
-
The Premium ADO.NET Source Component requires the ADO.NET connection manager. The component currently supports the following data providers:
- SQL Client Data Provider
- ODBC Data Provider
- OLE DB Data Providers
- Oracle Client Data Provider
- ODP.NET Managed and Unmanaged
- MySQL Client Data Provider
- PostgreSQL Data Provider
- Db2 Data Provider
- Firebird Data Provider
- Sybase Data Provider
- SQLite Data Provider
- Data Source
-
The Data Source drop-down displays a list of available tables and views from the database specified in the Connection Manager. Selecting a table here will automatically populate the Command property. This is a quick and easy way to generate a basic select statement for reading from the database.
- Command Timeout (since v7.1)
-
The Command Timeout option allows you to specify the number of seconds for the command timeout values. The default value is 120 seconds.
- Transaction Type
-
This option allows you to specify the type of transactions by choosing Explicit and selecting an Isolation Level or by choosing Implicit.
- Transaction Isolation Level (Available only when "Explicit" Transaction Type is selected)
-
The Transaction Isolation Level option allows you to specify concurrency behaviors for database tables. Different data providers support different isolation levels.
- Parameterize Command
-
Parameterizing commands protects against SQL injection. Only disable this option when it is required, and you have absolute control over the values being merged into the command.
- Schema Selector (Available only for Oracle connections)
-
When working with Oracle connections, a Schema Selector option appears to select the schema your user has access to.

- Command
-
The Command textbox is the command text that will be executed over the Connection Manager to read data from the database. A basic select statement can easily be generated by selecting a table or view from the Data Source property. You can then further customize the command to your liking to perform powerful queries.
The Command textbox now supports the use of User and System Variables. Simply select a variable under the Insert Variables drop-down menu, and a placeholder value will be inserted into the filter text.
- Import
-
Loads SQL from a file into the Command property.
- Export
-
Save the SQL in the Command property to a file.
- Preview
-
Opens a preview dialog that shows the result (up to the first 200 rows) of executing the text in the Command property over the specified Connection Manager.
Note: If the command makes any changes to the database, the changes will appear in the preview but are rolled back immediately. Changes to the database will only commit at runtime.
- Expression fx Button
-
Click the fx button to launch SSIS Expression Editor to enable dynamic updates of the property at run time.
- Generate Documentation Button
-
Click the Generate Documentation button to generate a Word document that describes the component's metadata, including relevant mapping and more.
Columns Page
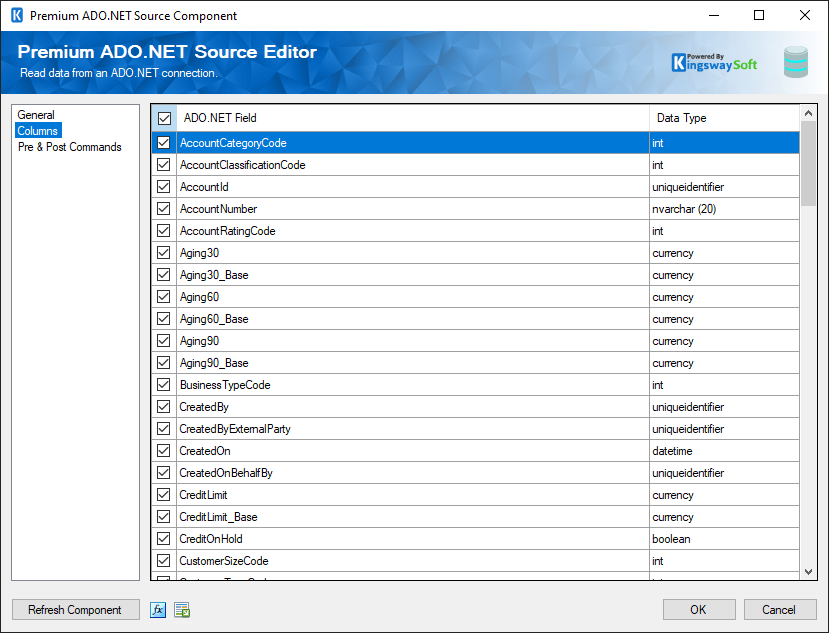
The Columns page of the ADO.NET Source Component shows you the available columns based on the settings on the General page.

On the top left of the grid, the checkbox can be used to toggle the selection of all available ADO.NET fields. This is a productive way to check or uncheck all available fields.
Note: As a general best practice, you should only select the ADO.NET fields that are needed for the downstream pipeline components. Do this on the columns page using the checkboxes or on the General page by removing the column from the command entirely.
Pre & Post Commands Page
The Pre & Post Commands Page page allows you to specify commands to execute before and after component execution.

Pre and Post Command textboxes now support the use of User and System Variables (since v21.1). Simply select a variable under the Insert Variables drop-down menu, and a placeholder value will be inserted into the command text. Post Command has been split into Success Post Command and Error Post Command (since v23.1).
- Pre Command
-
The Pre Command will be executed in the pre-execute phase. Leave blank to NOT execute any command.
- Success Post Command (Since v23.1)
-
The Success Post Command will be executed in the post-execute phase when it succeeds. Leave it blank if you do not want to execute any command.
- Error Post Command (Since v23.1)
-
The Error Post Command will be executed in the post-execute phase when an error takes place. Leave blank to NOT execute any command.

